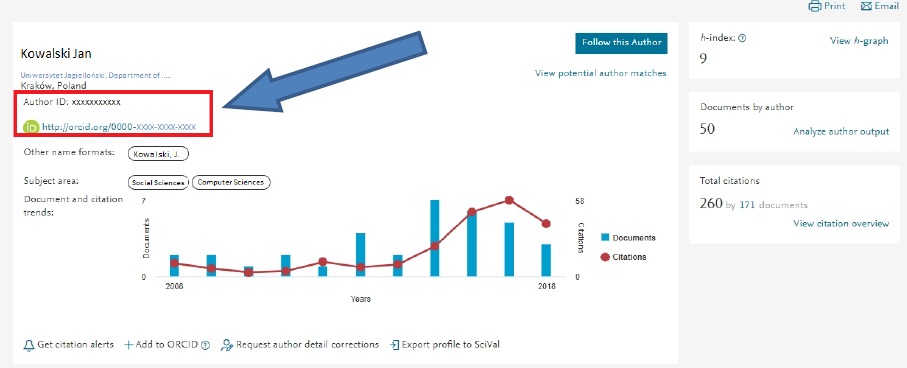
INSTRUCTION FOR CONNECTING ORCID ID WITH AuthorID (Scopus)
IMPORTANT NOTICE!
There is no need to create AuthorID in the Scopus, because it is created automatically for every researcher whose publication is in the database.
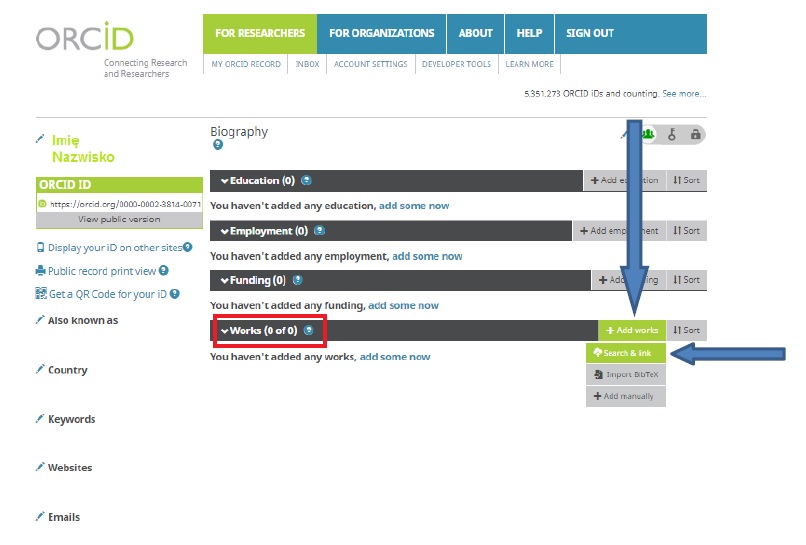
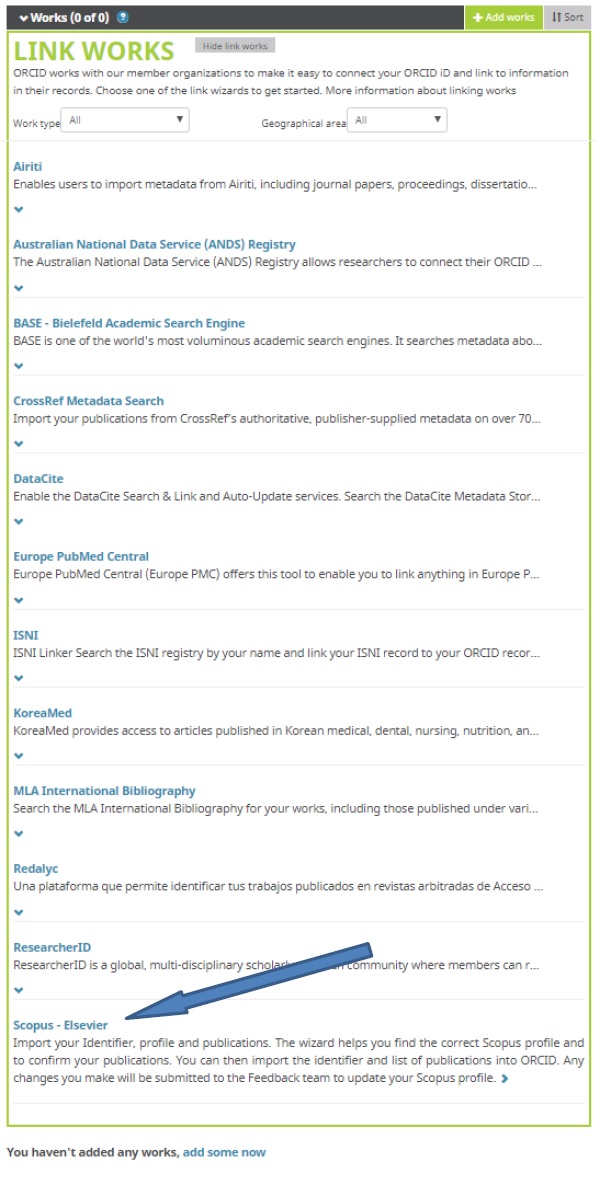
1. After logging in to ORCID (https://orcid.org/signin), click consecutively: Works → Add works → Search & link → Scopus - Elsevier [the last link in the list that will drop down]
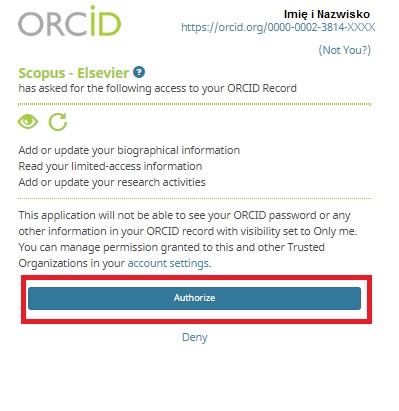
2. After clicking the link, a new window will open; here, you must give permission for connecting to the Scopus database by clicking the button Authorize
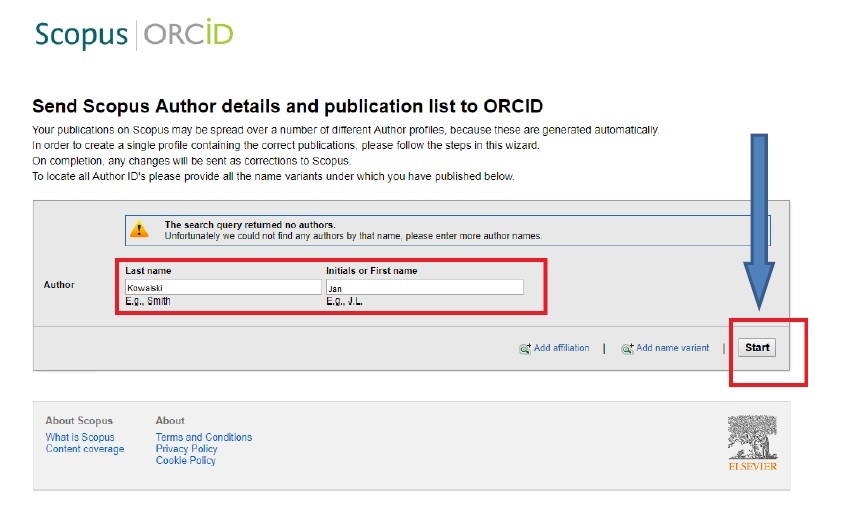
3. A window will appear on the screen with automatically completed information about the first name and surname; click Start
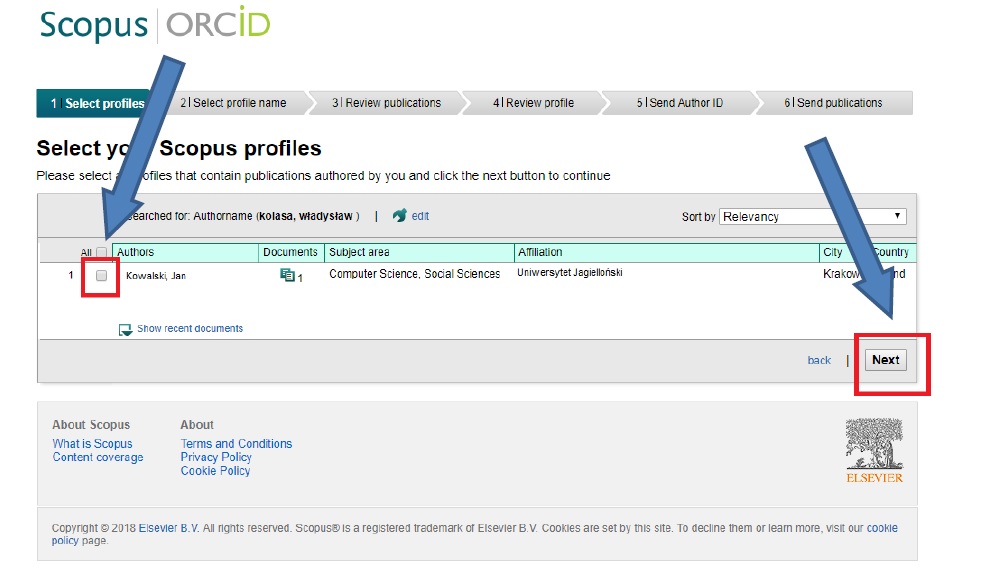
4. In the next step a list of profiles will appear; if there is more than one profile, select the right one and click Next
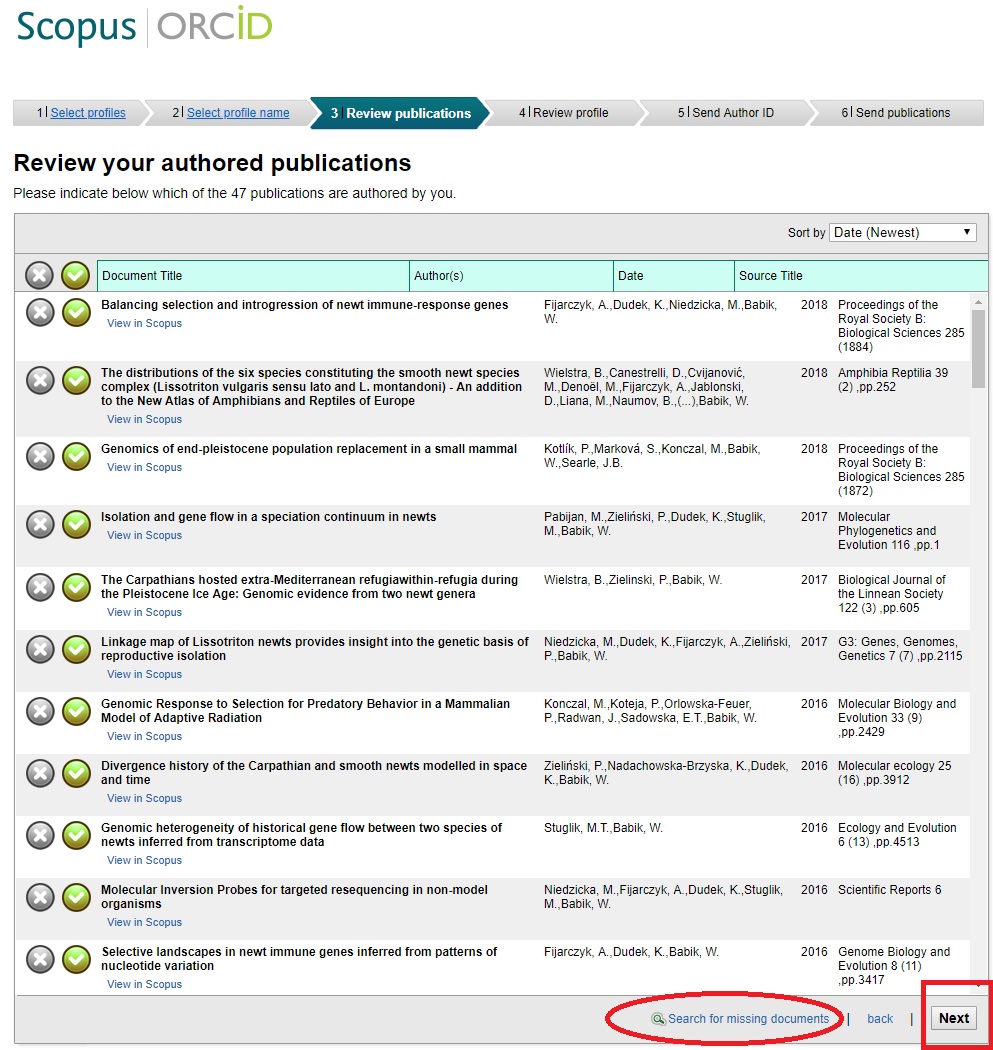
5. Select your preferred profile name in the next window and then you will be redirected to the verification page. After reviewing the list of publications and approving those whose author one actually is, click Next
NOTE! If you find some publication is missing, click Search for missing documentsand after searching for the missing works, attach them to your profile and only then go to the next page
6. On the next page Scopus will ask to check the correctness of personal data. After going on (using the button Next) one gets to a page where the e-mail address should be entered; next click Send Author ID and Send my publication list. The AuthorID from the Scopus database will then be sent to ORCID, as well as the list of publications from the publication database, which after importing will also be visible in the author's profile in ORCID, and the ORCID will appear in the author's information in the Scopus database (beneath the AuthorID)
